If you ever find yourself stuck outside with no roof over your head, knowing how to build a shelter can save your life. We are not talking about fancy cabins or treehouses. You need something simple, strong, and fast to keep you dry, warm, and safe from animals or wind. This guide will walk you through every step using stuff you can find in nature. No tools? No problem. We've got you covered.
When night falls in the wild, temperatures drop fast. Rain can soak you in minutes. Wind steals your body heat. Insects buzz around your face. Without cover, your body fights too hard just to stay warm. That drains your energy. And tired people make bad choices. A good shelter slows down heat loss. It blocks rain. It gives you peace of mind. You sleep better. You think clearer. That's how you survive longer.
We've seen folks panic and waste hours building the wrong thing. Don't be that person. Start simple. Use what's around you. Your goal is not perfection, it's protection.
Where you build matters more than how you build. A bad location can ruin even the best shelter. Here's what to look for:
You might feel tempted to build near a pretty stream. Resist that urge. Flash floods happen even when the sky looks clear. Safety first. Always.
Before you stack one stick, clear the area. Remove sharp rocks. Pull out thorny plants. Sweep away wet leaves. You don't want to lie down on a hidden cactus or ant hill. Trust us - that's a mistake you only make once.
Use your hands, feet, or a flat branch to scrape the ground clean. Make a space big enough for your whole body to stretch out. Add a little extra room for your gear. Better too big than too small.
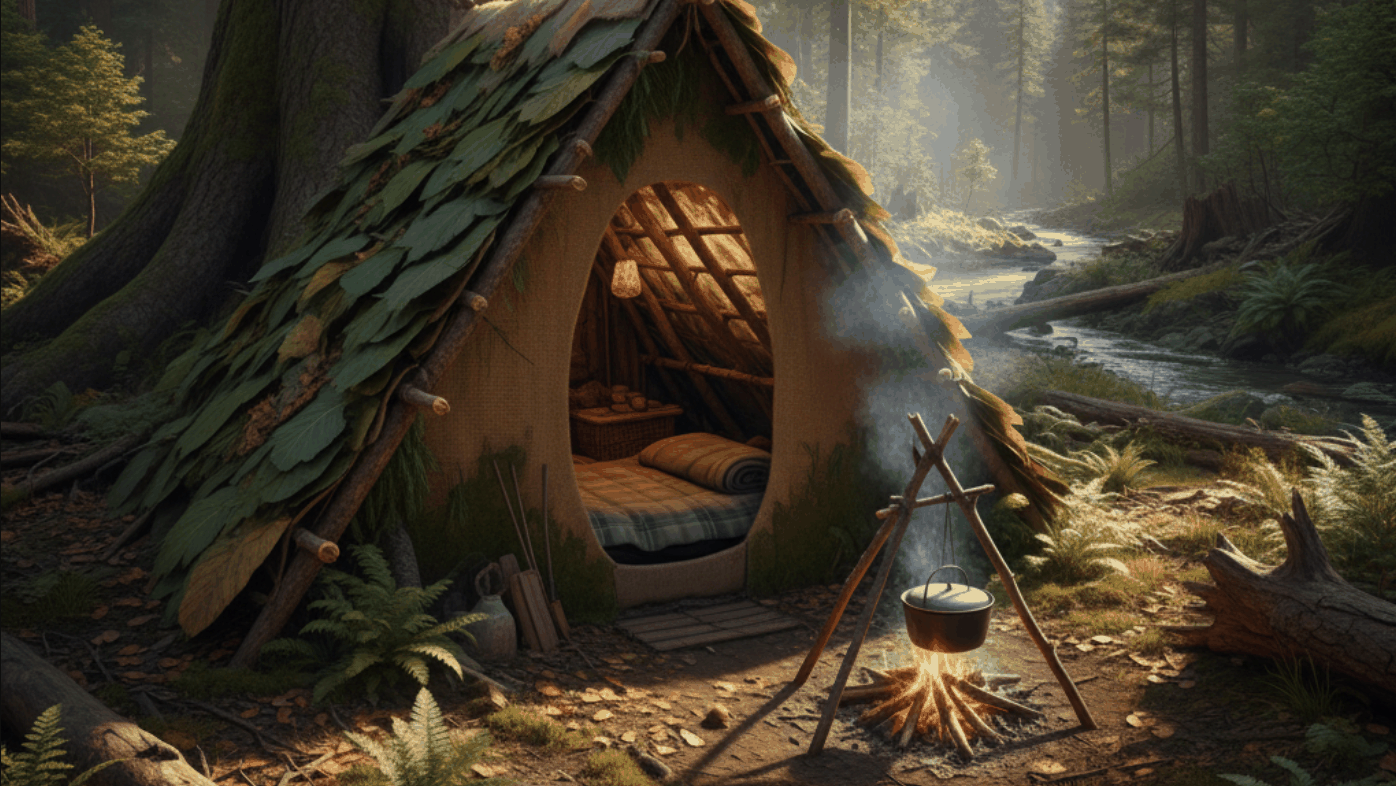
Not every forest or field offers the same materials. You need to adapt. Here are three simple designs that work almost anywhere.
This is the go-to shelter when you're tired, cold, or in a hurry. All you need is one long, sturdy branch and lots of smaller ones.
You crawl in from the front. Your back stays against the wall. Your body heat bounces off the slanted roof. It's not fancy, but it works. We've slept in lean-tos during snow and never woke up cold.
If you've got a few extra hours and more branches, this one traps heat better. It's shaped like a tent with two slanted sides meeting at the top.
You crawl in through the low end. The space inside is snug. Your breath warms it up fast. If you add a small fire just outside the entrance, the heat reflects off the walls. Cozy doesn't mean complicated.
This one takes more time and effort, but if it's freezing or snowing, this is your best bet. It hugs your body like a sleeping bag made of sticks and leaves.
Once you're in, you're surrounded by insulation. Your own body heat keeps the inside warm. We've tested this in near-zero temps. Woke up sweating. That's how good it works.
The walls keep wind out. The roof and bedding keep you warm. Never skip insulation. Even a small breeze will suck heat from your skin.
Look around. Nature provides everything you need:
Always add more than you think you need. Then add more. Cold creeps in through thin spots. You won't notice until it's too late.
Even a great shelter fails if you lie directly on cold earth. The ground pulls heat from your body like a magnet. You need a barrier.
Gather soft, dry stuff. Leaves. Grass. Pine needles. Ferns. Pile it up where you'll sleep. Make it at least six inches thick. Flatten it down with your body. Then add another layer. You want a mattress, not a rug.
If you've got a tarp, emergency blanket, or even a garbage bag - lay it under the bedding. That blocks ground moisture. Wet equals cold. Always.
Little things turn a rough night into a safe one. Don't rush out of your shelter at sunrise. Take five minutes to seal the gaps.
You might think these steps are small. But in survival, small things save lives. A drafty shelter means restless sleep. Restless sleep means bad decisions tomorrow. Don't let laziness cost you comfort.
We've watched too many people waste energy on shelters that fail. Learn from their errors:
Mistakes happen. But the wild doesn't forgive them twice. Slow down. Think it through. Build it right the first time.
Don't wait until you're lost to try this. Go to a local park or your backyard. Build a mini version. See how long it takes. Test how warm it feels and figure out what materials work best near you.
You'll learn fast what's easy and what's frustrating. That knowledge sticks. When real danger hits, your hands will remember what to do. Muscle memory beats panic every time.
We built our first shelter in a city park. Used only sticks and fallen leaves. Slept in it overnight. Woke up dry and warm. Felt like a champion. You can too. Grab the full collection of emergency preparedness files from the site's main page